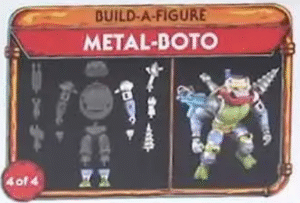
The Turtles of Grayskull action figure line is an exciting crossover between Teenage Mutant Ninja Turtles and Masters of the Universe. One of the most sought-after collectibles in this line is the Metal-Boto Build-A-Figure (BAF). Unlike standard figures, Metal-Boto comes in parts included with specific deluxe figures, so you’ll need to collect multiple figures to assemble the full BAF. This guide shows you exactly which figures you need, what parts they include, and how to assemble Metal-Boto step by step.
What is the Metal-Boto Build-A-Figure?
A Build-A-Figure (BAF) is a figure that comes in pieces distributed across multiple action figures. Each deluxe figure in the Turtles of Grayskull line contains one or more parts of Metal-Boto, which means completing the figure requires collecting multiple figures.
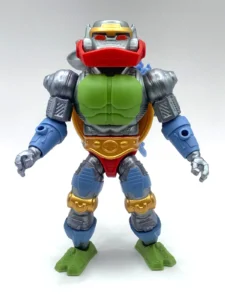
Metal-Boto is a striking figure that blends cybernetic and fantasy armor elements, making it a centerpiece for any collector’s display.
Figures You Need to Complete Metal-Boto
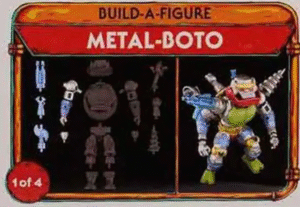
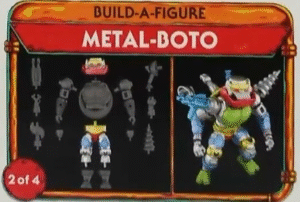
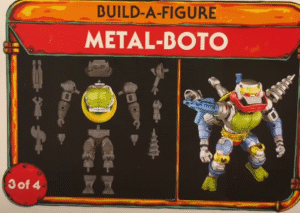
According to our Turtles of Grayskull checklist, the four deluxe figures containing Metal-Boto parts are:
| Figure | Wave | BAF Parts |
|---|---|---|
| Mouse-Jaw | Wave 1 | Right Arm, Roboto Arm Attachments |
| Sla’Ker | Wave 2 | Waist, Legs, Head |
| Splinter-Skull | Wave 3 | Torso, Shell |
| 2-BOPSTEADY | Wave 4 | Left Arm, Metalhead Arm Attachments, Feet |
Collector Tip: Some of these figures are Target-exclusive or limited. Monitor multiple sources to find missing parts without buying duplicates.
Step-by-Step Guide to Assembling Metal-Boto
Once you have all four deluxe figures, follow these steps to assemble your Metal-Boto Build-A-Figure:
Step 1: Unbox and Sort Parts
- Carefully remove the Metal-Boto pieces from each figure.
- Lay the parts on a clean, flat surface.
Step 2: Start with the Torso
- Begin with the torso and shell from Splinter-Skull, which serve as the core of Metal-Boto.
- Ensure the torso is aligned to accept the limbs.
Step 3: Attach the Limbs
- Attach the arms first: Right Arm from Mouse-Jaw and Left Arm from 2-BOPSTEADY.
- Attach the legs: Waist and Legs from Sla’Ker and Feet from 2-BOPSTEADY.
Step 4: Add the Head
- Place the Head from Sla’Ker onto the torso. Ensure it fits securely.
Step 5: Attach Accessories
- Add any robotic or armor attachments included with Mouse-Jaw and 2-BOPSTEADY.
Step 6: Adjust Articulation
- Pose Metal-Boto carefully for display. Avoid forcing joints to prevent damage.
Tips for Collecting and Displaying
- Display Safely: Keep your assembled Metal-Boto out of direct sunlight to prevent paint fading.
- Preserve Packaging: Retaining boxes maintains value for resale or trade.
- Use AFI as Reference: The AFI checklist is the most accurate source for parts and waves, helping you avoid mistakes when collecting.
Where to Buy
Complete your Metal-Boto BAF with these reliable sources:
- Amazon – Great for new releases and some exclusives.
- eBay – Ideal for sold-out figures or single BAF parts.
Pro Tip: If you’re not interested in the figure that comes with it, buying individual BAF parts can be easier and more cost-effective.
Collector’s Wrap-Up
Completing the Metal-Boto Build-A-Figure is a rewarding milestone for any collector of the Turtles of Grayskull line. By collecting the four deluxe figures — Mouse-Jaw, Sla’Ker, Splinter-Skull, and 2-BOPSTEADY — and following the step-by-step assembly guide, you can create a centerpiece figure that perfectly blends TMNT and Masters of the Universe aesthetics.
Using the AFI checklist ensures you have every part, from torso and limbs to head and robotic accessories, while avoiding duplicate purchases. Remember to display Metal-Boto safely, keep packaging for potential resale or trade, and use the articulated joints to pose the figure for your collection.
With Metal-Boto fully assembled, your Turtles of Grayskull collection reaches its next level, showcasing one of the line’s most impressive crossover figures. Check back on AFI for updates, wave tracking, and guides for other figures in the series to continue growing your collection.